It's been a year and a half since anyone posted here so I fully understand if this post is totally ignored. But I still wanted to share my latest creation.
For Christmas I got a new Kindle. While waiting for it's delivery, I spent days shopping online for the perfect case. I didn't like anything I saw in the Amazon marketplace but more than one that I loved on Etsy. But I also didn't want to shell out 1/3 the price of my device for a case. I began hunting tutorials and came across a few that I really liked (one in particular for it's wording alone) but I still wasn't satisfied with what I saw.
So....I decided to make my own.
Step #1: Pick the proper book. It needs to be similar in size to the device it will house...and it needs to have a decent title. You're going to appear to be reading this particular book for...well...possibly the rest of eternity so you might want to avoid titles like The 24 Hour Diet or The Beanie Baby Handbook. I went with Agatha Christie's Curtain. Can't go wrong with Hercule Poirot. I also pickeused out fabric to line the book with that compliments it's colors (I like a festive lining). Walmart has lots of beautiful fat quarters. I actually used a fat half but could have gotten away with a quarter easily.
Step #2: Disembowel the book. This part actually a bit painful....for me and the book. You simply score along the edges of the inside cover with a pair of sharp scissors or an exacto knife (I really need a new one of those- this was more sawing than scoring). Yes, I kept the innards of this book. I plan on reading it. It's the least I could do after gutting it in such a fashion.
Step #3: This is where I differ greatly from the tutorials I perused. I cut pieces of lightweight poster board to match the book size (the title page made a good template), then fusible quilt batting to match the poster board. I did use actual cardboard for the spine for extra stability.
Step #4: Cut the fabric so that it will cover each piece and have plenty to wrap around. One of the faces needs to have enough fabric on one side to cover the entire front cover, spine, and a few inches onto the back cover. Fuse the quilt batting to the fabric with a hot iron.
Step #5: None of the tutorials I saw inclued pockets. I love pockets. I know that the kindle itself should hold all the information I need without my packing around a bunch of paper slips, but darn it all- I wanted pockets. A bit of fusible interfacing and the finished edge of the fabric makes a lovely top seam for the pockets.
Step #5: Glue the fabric to everything! Well, maybe not everything but it sure as heck felt like it. Basically you're wrapping the poster board like a present. A very sticky present. (Fabric glue works really well. I used clear Tacky Glue but if I were to do it again I think I'd go with something like Fabri-Tac). Remember that extra length for the front cover? Don't glue it down. We'll get to that in a minute.
Step #5: Let everything dry. Clothes pins work great holding everything in place until it all sets up. Be careful not to glue you items to say, the table top, or a book you thought you could press them flat with, or another piece of paper, or your hands.
Step #6: Attach elastic bands on all 4 corners of the back cover to hold your device. I laid my kindle down on the cover and decided where to place the first strap, then I used a piece of paper to make a template to be sure each corner had the same angle. This is when I added the pockets to the front cover but alas, I forgot to take a picture. You're also going to glue a piece of elastic to the inside cover to keep the case shut.
Step #7: Glue the front cover in first laying the unfinished edge across the spine. Then add the covered spine (I added an elastic loop for a stylus incase I ever decide I want one), and the back cover.
Step #8: Once it's all glued together I stacked The NIV Exhaustive Concordance and Miss Manners Guide for the Turn-of-the-Millennium to weight the entire thing down and left it over night. If you do not have the above mentioned titles, that dictionary you haven't used since the Internet became a household necessity will work just fine.
Step #9: The next morning you can unstack the books and add the device of your choosing. (If you look very carefully at the right side of the spine you can see where I didn't leave quite enough fabric to cover the entire inside of the case. Oh well. You live, you learn....you craft, you learn even more.)
Voila!!
Did you ever need a little nudge, a little kick in the pants?.... A little pull, a little push, To rid yourself of "I can'ts?" Do you need to have your engine revved, Your tires pumped up with air, Your horn tooted by someone 'cept you?.... Well, Congratulations! You're there!...Cate
Showing posts with label Farm Wife. Show all posts
January 05, 2014
May 23, 2012
Clothes pin Apron
I realize no one's been here in nearly a year (maybe longer), but I feel guilty totally abandoning such a wonderful creative outlet. So I thought I'd post my latest creation. It's nothing supremely special, but I did make it all by myself & that qualifies it for Nudge-Nudge status.
I made a clothespin apron. It's just a simple 2 (giant) pocket half apron made to hold the massive number of clothes pins I need to hang the 85,000 articles of clothing the FarmHands dirty each day. I had one of those pin bags but it didn't stand up to years of use and was beginning to fall to pieces on me.
I emptied my scrap drawer and pulled out one of the largest pieces of non-flannel fabric I had and stitched this up. I had to to a bit of piecing together as I didn't have quite enough of any one fabric to make the waist band with.
The above picture is the apron empty and hanging sweetly (Lilly May and Buddy Joe needed to get in on the act, too). Below is it stuffed to the gills with clothes pins.
It almost makes me excited to do laundry tomorrow......almost.
I made a clothespin apron. It's just a simple 2 (giant) pocket half apron made to hold the massive number of clothes pins I need to hang the 85,000 articles of clothing the FarmHands dirty each day. I had one of those pin bags but it didn't stand up to years of use and was beginning to fall to pieces on me.
I emptied my scrap drawer and pulled out one of the largest pieces of non-flannel fabric I had and stitched this up. I had to to a bit of piecing together as I didn't have quite enough of any one fabric to make the waist band with.
The above picture is the apron empty and hanging sweetly (Lilly May and Buddy Joe needed to get in on the act, too). Below is it stuffed to the gills with clothes pins.
It almost makes me excited to do laundry tomorrow......almost.
March 04, 2009
Flock of Seagulls Butterflies
Almost 2 years ago, when Nudge-Nudge was brand new, Phinner made some really cool paper butterflies. A few days later she made another one just for my BabyGirl. By the way, Phin, that picture still hangs on BabyGirl's bedroom door!


One of my favorites is the tiny one I made with random scrap pieces from other butterflies. I
hated to throw the scraps away, so I glued them all on a solid piece & then cut this out.
A few weeks later QM (my mother) ordered the kit so she could make some for BabyGirl's room. She blew up the patterns on a copier so we'd have all different sizes.
Last summer she gave me the kit & I started making them. I got a bit obsessed & spent a few days cutting out scrap booking paper, but I never finished most of them. Today I was cleaning out some stuff in my room when I found the unfinished butterflies & decided they needed to be put together.
In the end I made 14 butterflies. One was used last summer as a gift tag on a wedding present. The other 13 will be hung from the girls' bedroom ceiling somehow. How exactly, has yet to be decided. I'm considering tacking them to thin satin ribbon & pinning it into the ceiling, but I doubt my husband will go for that. :) I'm also thinking about cutting a few thin branches from our woods & hanging them from that making a sort of mobile to hang from the light in their room.
One of my favorites is the tiny one I made with random scrap pieces from other butterflies. I
And one final "flutterby." I love this dark blue paper. It came in the kit, so I'm not sure what the name of it is, but it looks like a glossy mulberry paper to me. It also has a lot of texture, but the shine makes me think of new
leather.
I'll post a picture when I get them all finished & hung up.
December 18, 2008
The accidental pillow
The day I made the taggies & Bitsy's diaper bag, I attempted to make her a doll blanket out of scrap fabric. I've never been good at patchwork & discovered early on that I didn't have enough material to make a blanket big enough to wrap up her babies. Then I had a brilliant idea for making a blanket binding that would make it just the right size...but since I am neither an engineer nor someone who can visualize a finished project easily, my brilliant idea turned the blanket into a boxy pillow.

In the end it won't matter. Bitsy's only 18 months old. She'd be thrilled if I gave her a paper sack full of fabric scraps for Christmas. A pillow of her very own might make her explode from excitement.
December 16, 2008
Even more taggies & another diaper bag
I know I'm turning into a one trick pony around here, but I can't help myself. I love making these things. I think after the first of the year I may make a few & try to sell them on Etsy. These are actually for my Grandmother's two tea cup poodle puppies (they weigh in at 2 1/2 and 5 pounds each). She noticed they love to drag stuffed toys around by their tags & asked me to make them one. I found two different dog themed fabrics in my scrap basket, so each pup is getting their own.
The bag is Bitsy's Christmas gift. It's a baby doll diaper bag very similar to the one I made for her sister a year & a half ago. She's already tried to take it away from me, but I spirited it away to be wrapped.
April 14, 2008
It's Taggy Madness
Once I got started, I just couldn't stop!! I really should make one for my own child....1
March 31, 2008
Head Band How to
I'm sorry it's taken so long for me to get these instructions posted. I wrote them months ago, but decided they needed pictures. That's what's taken so long. But better late than never, I hope.

First of all, I'd like to state that this takes minimal sewing skills. If you can sew a straight line, you can make one. Fear not! It also doesn't take much fabric, so it's a good way to use up scraps.
The best way I've found to do this is to make a pattern with freezer paper first instead of trying to measure & cut out on the fabric its self.
You need one strip of fabric measuring 7 inches wide by 16 inches long (well call this one A), a second 3 inches wide & 12 inches long (and this one B), and a 6 inch strip of elastic between 2/3 of an inch and an inch wide.
On strip A fold the long sides of the fabric in 1/4 inch, then 1/4 inch again on the wrong side of
the fabric so the raw edges are completely hidden. On the short ends, you only need to fold them in once as this end will be hidden. Press down & stitch down all the way around the strip. You can either use a straight stitch in a color thread that will blend in, or a contrasting thread with a zig-zag stitch. I used the zig-zag contrasting stitch for the more casual head bands.
Next, fold the short ends of Strip B down to the wrong side of the fabric, press, and stitch. Then fold the band lengthwise with right sides together, and seam along the length only (5/8 inch seam allowance). This will be the casing for the elastic. Turn right side out & press.
Take Strip A & pleat the ends together (it doesn't have to be a perfect pleat) until the end is small enough to fit into the casing for the elastic. I whip stitch the pleats closed by hand. Then secure one side of the elastic band to one end of Strip A. Thread the elastic through the casing & sew the opposite end of the elastic to the opposite end of Strip A.
March 16, 2008
Taggy Blanket
I used one piece each of two contrasting fabrics (actually left overs from a swaddling blanket I made a few weeks ago, one pink cotton, one patterned baby flannel), and 5 different spools of ribbon in different colors & textures. I'm not 100% sure, but I think the two rectangles measured 17" x 20". The ribbons were cut in 5" lengths with pinking shears to prevent fraying (although next time I think I'll make the ribbons 3 1/2" to 4" long for slightly shorter tags). On the semi-solid fabric I stitched "Sweet Baby Girl" in yellow using tear away cross stitch fabric.
Then I folded the ribbons in half, and pinned them to the right side of the flannel with the loops facing the center of the fabric & the raw edges matching up with the raw edge of the fabric. Make sure you keep the ribbons at least an inch away from the corners.
U
sing the side of the presser foot as a guide I ran a seam as close to the raw edge of the fabric as possible. I set the needle position on my machine to sew along the far right position. On the second seam, I moved the needle to the center position but continued to use the edge of the presser foot as my guide.
I pinned the right sides of the fabrics together and seamed around the edges with a 5/8" seam leaving a hand width opening to turn the fabric. Clip the corners & turn the fabric right side out.
After whip stitching the opening shut, I pressed the edges of the blanket down flat. Finally I ran a zig-zag stitch around the outside edge of the blanket to prevent it from rolling up when washed & totally secure the ribbon tabs.
Here's the end results. As I said before, the tabs turned out a tad longer than I'd like, but I'm still very happy with the finished product. And I've found the gross grain ribbon is the easiest to work with. The satin finish snags too easily.
BabyGirl is giving it to her teacher's first grandbaby. She's very happy with it (she helped lay out the ribbon pattern).
March 15, 2008
Bunny in an egg
It's ears are made of white craft foam that I cut in a petal shape. The teeth are also craft foam. I used the sticky tabs you put on the back of photos for scrapbooking to stick the craft foam to the egg since the glue wasn't drying. Two googly eyes & half a cotton ball complete the bunny.
I cut out all the foam, put the stickies on the back of the foam, and put it all inside the eggs so all I have to do is pass out the eggs.
Very easy. Very cheap. Very cute (at least I think so). Now I only hope the kids like them.
December 17, 2007
Church Baby
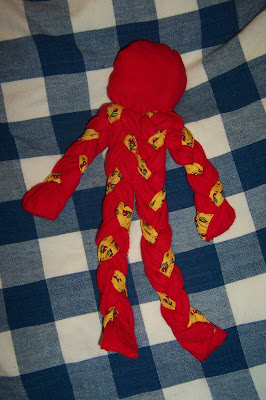
This is the second portion of my crafty endeavor. It's a church baby for Bitsy's stocking. Princess got one for HT at a craft fair last spring & I thought it was adorable. I found the instructions on line at: http://www.bevscountrycottage.com/churchbaby.html

She's made from red flannel scraps & Mary Englebright cherry scraps. I think I may name her Charlotte after Laura's doll in the Little House books. Her head could look better...but I doubt my 5 month old will mind.
I have to say, I love projects made entirely with scrap fabric.
(I'm having problems with the picture. If you can't see it, let me know.)
She's made from red flannel scraps & Mary Englebright cherry scraps. I think I may name her Charlotte after Laura's doll in the Little House books. Her head could look better...but I doubt my 5 month old will mind.
I have to say, I love projects made entirely with scrap fabric.
(I'm having problems with the picture. If you can't see it, let me know.)
Head Bands
Saturday I was over come by the spirit of craftiness. These are a portion of the fruits of my labor. They're head bands for my sister, Princess, for Christmas. I saw them at Wal-Mart a few weeks ago & figured I could make them myself instead.
I tried it and it didn't turn out quite the way I'd like, so I went back & bought one (the black & white hounds tooth is from Wal-Mart). I used that one to make a pattern, dug out all my scrap fabric, and cranked out the other four. I hope she likes them. I wear mine constantly!

And in case you're wondering, no, the two purple ones are not made from dupioni silk. They're actually polyester made to look like silk. Left overs from my bridesmaid dress from my best friend's wedding last spring (you may remember it if you read my blog). The one with flames matches a blanket I made Princess when she was pregnant with my nephew, and the Elvis band (green polka-dotted) matches the diaper bag Art had made for her. The Elvis band is reversible. If anyone wants instructions, let me know & I'll post them.
December 12, 2007
A little Christmas Twinkle, anyone?
I only wish I'd made this myself. It was a gift from my dad's co-worker. He and his wife make them. It's a glass block (the kind you get at the home improvement stores for remodeling bathrooms) with a hole drilled in the back. White twinkle lights are strung through the back (I think it's a short strand) and the bow is made with wired ribbon so you can re-fluff it every year.
October 29, 2007
Toilet Paper pumpkin
I cannot take credit for this in the slightest. BabyGirl brought it home from school today & I had to share it. It's too cute to keep secret!
As far as I can tell you take a roll of toilet paper and set it on a piece of orange cloth. Bring the cloth up the sides of the roll & tuck the cloth into the top of the toilet paper roll. Then a piece of brown paper is rolled up and stuck in the top to make the stem with green pipe cleaner for the vine & a green felt leaf. The yellow spider is a ring.
I wish I'd have thought of this!!
June 05, 2007
Doll Diaper Bag
Tonight I decided (at 5 pm) that I would just make her one. I also made her a tiny burp cloth to match (that's it hanging over the side of the bag). I am proud of this project for the following reasons: 1. I had no pattern, so I made one. 2. It's made entirely out of scrap material left over from a baby blanket I made a few years back. 3. It's sort of quilted & I've never done that before.
I hope she likes it!
April 08, 2007
Hand Lilies
Here's another easy, cheap project to do with the kids. Lilies made from hand prints. We made them with the pre-k class in VBS last summer and I borrowed the idea today for our Easter project at church. We made this bunch to give to the Queen Mother as an early Mother's Day gift.
- Trace and cut out hand prints.
- Make small loop with one end of the pipe cleaner and glue to palm of hand print.
- Cut out leaf shapes, wrap around pipe cleaner and glue down (I use clothes pins to hold them in place until the glue dries).
- Once all glue is dry, wrap hand print around pipe cleaner loop and tape or glue together.
- Gently roll fingers back to make petals.
That's it. Simple. Cute. Enjoy.
March 24, 2007
Super Simple Suncatchers
The kids and I made these one day a few weeks ago. It was raining and they needed distraction. They are so easy and can take as much or as little time as you want. I think I may like making them as much as the kids do.
You take coffee filters, smash them down flat, color them however you want with washable markers, spritz them lightly with water from a spray bottle, wrinkle up, smooth out, dry on paper towels, & hang however you like. Think of it as elementary tye-dye. And they are cheap so you can make new ones as often as you like.
My kids love seeing how they change once wet and crumpled. It can keep them busy for a good 30-45 minutes. With 3 kids, that's not bad.
March 15, 2007
A Little St.Patrick's Day Flare
The Queen Mother brought some St.Patrick's Day notions for me to sew on a t-shirt for BabyGirl to wear to her school party tomorrow. Since green is BabyGirl's least favorite color, I figured I'd get it done, and she'd refuse to wear it. Instead I picked up some green buttons to add to the collection & made her this pin. It's just sparkly and dangly enough to thrill a five year old to no end.
April 24, 2006
Baby Girl's Art Work

I just had to share these. Baby Girl made them in Preschool all by herself...as she loves to remind me. She cut them out, glued them together, and colored them for me. I love them both!
The red one is a "hula girl" inspired by a tatto on her great-grandfather's arm. The other she made about a month later. It's a house for the hula girl to live in...naturally. She's so proud of them, I couldn't help but show them off. I have to say, I was impressed by the detail a 4 year old put into them.
April 03, 2006
Something Sparkly from the Farm

Blogger hate me. I've been trying this all day and it will not work...getting a tad frustrated here!
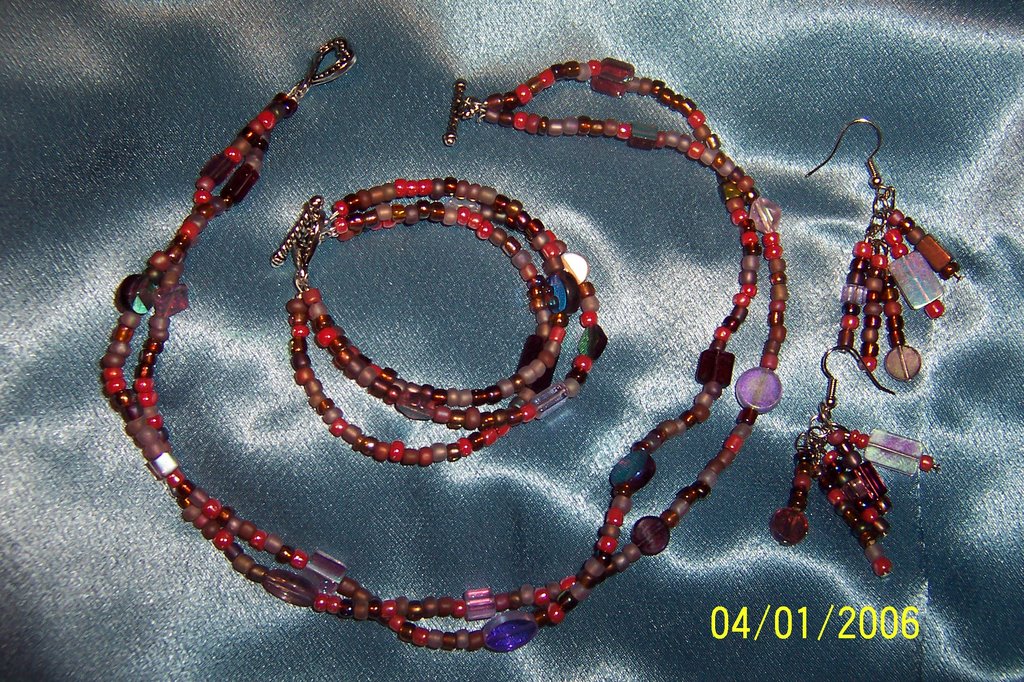
This is the jewelry I made to wear to Inkling's wedding. Mama bought me a fabulous outfit but I needed something sparkly to go with it. I looked, but wasn't impressed with my choices at Wal-Mart (where else do Farm Wives shop?) so I headed to their craft dept. After $8.63 in supplies, this is what I came up with. And I have extras left over to play with.
The colors are a little off in the photo, but you get the idea. They're not as deep in real life, more rosy pink, less earth toned. I like the earrings, but think they may be a bit much so I'll probably save them for a time I'm not wearing the necklace.
I'd forgotten how much I love beads until I started this. I probably restrung the necklace 4 or 5 times before I was satisfied. That's what's great about beads, they're so easy to change. I think I may make some stuff for Baby Girl and the other 2 flower girls to wear after the wedding. The real trick will be saving them until Easter... you didn't really think I'd make it until May did you?
March 24, 2006
Baby Blanket

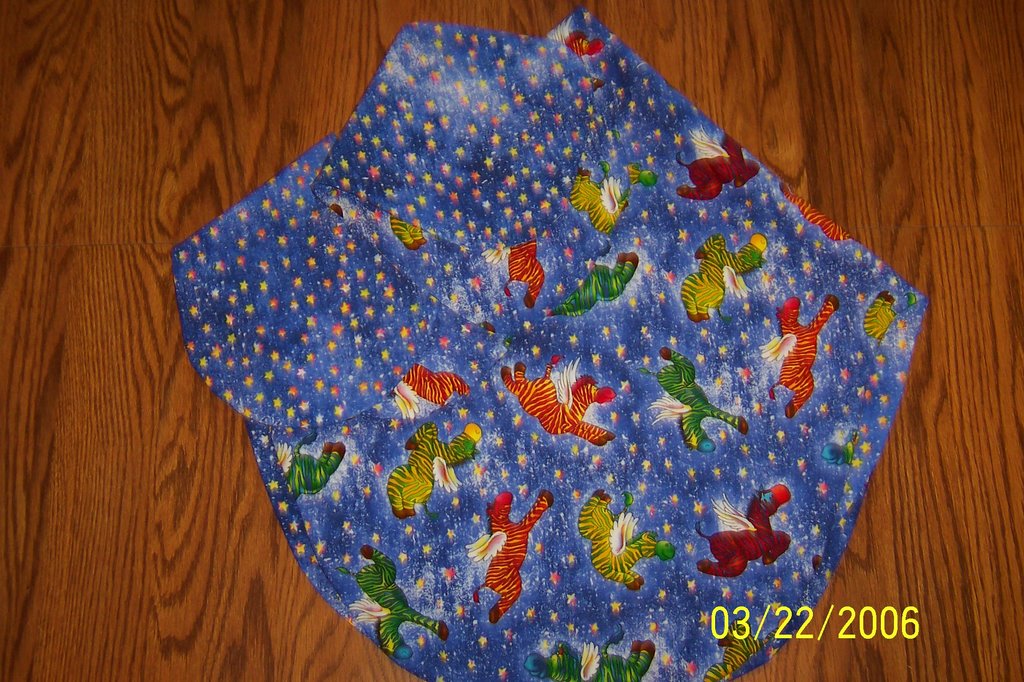
This is a clover leaf blanket I made for my friend Kork. She's having her first baby in June and this is the gift I make everyone. It's easy to make, you can change it up as much as you like (Mom adds giant ric-rac or eyelet lace to the edges), and it folds up nicely to mail (Kork lives in Colorado).
It's made specifically for swaddling. My mom made these for all her friends' babies when I was growing up. My kids have about 6 of them she's made.
Kork doesn't know the baby's gender, so I wanted a material that would work either way. I'm sure she's tired of yellow and green by now and when I saw these beautiful zebras I knew they had to go live with her. The material is from Wal-Mart and is called "A Zebra of a Different Color." The back of the blanket is the coordinating fabric.
There are also 2 burp clothes made of the same material. I cross stitched "Welcome to the worked Baby Z" on one and "Baby Z" on the other using tear away cross stitch fabric.
Subscribe to:
Posts (Atom)