December 18, 2008

The accidental pillow

The day I made the taggies & Bitsy's diaper bag, I attempted to make her a doll blanket out of scrap fabric. I've never been good at patchwork & discovered early on that I didn't have enough material to make a blanket big enough to wrap up her babies. Then I had a brilliant idea for making a blanket binding that would make it just the right size...but since I am neither an engineer nor someone who can visualize a finished project easily, my brilliant idea turned the blanket into a boxy pillow.

In the end it won't matter. Bitsy's only 18 months old. She'd be thrilled if I gave her a paper sack full of fabric scraps for Christmas. A pillow of her very own might make her explode from excitement.

December 16, 2008

Monkey Cake


Here is the cake I made for my daughter's 3rd birthday.

Even more taggies & another diaper bag


I know I'm turning into a one trick pony around here, but I can't help myself. I love making these things. I think after the first of the year I may make a few & try to sell them on Etsy. These are actually for my Grandmother's two tea cup poodle puppies (they weigh in at 2 1/2 and 5 pounds each). She noticed they love to drag stuffed toys around by their tags & asked me to make them one. I found two different dog themed fabrics in my scrap basket, so each pup is getting their own.
The bag is Bitsy's Christmas gift. It's a baby doll diaper bag very similar to the one I made for her sister a year & a half ago. She's already tried to take it away from me, but I spirited it away to be wrapped.

November 05, 2008

election day blanket


I finished this baby blanket for my friend's newborn son yesterday, Election Day. Does the fact that it's crooked have any political significance? j/k

I really need to learn some more stitches, but I'm doing well to make something usable with the little crochet that I can do.

With fall here, perhaps some of you other "hookers" and "knitters" have projects to share?

mermaid cake continued


I just had to share a pic that showed what the cake looked like before it faded in the car.

So the main differences between the pattern from the site I listed in the previous post's comments and mine are that I used a 6" pan for the head instead of 8". And I used fondant for the scales instead of necco wafers. (I also used fondant for the waves, bubbles, flowers, facial features, etc. and that's brown sugar at teh bottom to look like sand).

Hannah's Mermaid cake


I kept waiting for my sis to post this herself, but since she hasn't yet, I have to share it with you.
She made my daughter a mermaid cake for her 3rd birthday.

September 05, 2008

monkeying around


I've begun planning for Juliana's Halloween costume. She's going to be Curious George and we're going to try to get Brett to be the Man in the Yellow Hat. I'm pretty cheap, so I've been thinking of cost-effective ways to turn Juliana into a monkey. I got her brown leggings (which she will wear under skirts in the fall anyway), and a brown shirt (also usable at other times besides the 1 day). Today I made her monkey ears out of felt and hair clips. I clipped them onto a headband so that they would be in front of our existing ears. I think I'm going to get some beige felt to put inside them too, but our little town didn't have any. She will also carry around a banana... I'm keeping my eyes peeled for a fake one. I bet they probably have one at Hobby Lobby or something. Anyhoo, here are the monkey ears (pardon J's bedhead... she just woke up. She'll be wearing loopy pigtails with her outfit.)

August 03, 2008

more cake...

... I'm pretty caked out. I had some leftover supplies from the church cake and tomorrow our church is serving lunch for the teachers at a local elementary school during inservice. So I decided to decorate a small cake for the teachers to use up my supplies. (I already had the cake itself in the freezer). It won't be enough to feed them all, but I didn't officially sign up to bring anything. So it will just be a pleasant surprise in addition to whatever other people bring I guess.


Photobucket - Video and Image Hosting


Photobucket - Video and Image Hosting


August 01, 2008

Happy BIRTH-DAy dear chu-uuuurch...


It's not really the church's birthday. Sunday is Homecoming at our church and I made a cake for it... a cake that is supposed to look like our church is on it. When Juliana saw the cake, she started singing happy birthday to the church :) Apparently, cakes are specifically for birthdays.

July 25, 2008

Baby Crafting

It's been forever since I've gotten around to posting in here. But it is high time.
I'll confess, most of my crafting comes about because I'm cheap.
I'll look at something and think "well, I could do that for less than what they want for it". Like pacifier clips for instance. In the store they are a couple of bucks and most have characters on them. If you go on ebay or elsewhere online there are custom ones but they are also charging several bucks for just one paci-clip. So instead of purchasing one, I looked at the picture, bought some supplies and now have enough to make 10 for the price of about 3. I figure I have enough friends who are expecting right now, that I can happily share the wealth.

Here's my first Paci-clip on one of Lil-bit's outfits


I also made some wall art for her nursery. Someone - long ago posted a link to a webpage that gave instructions for making a clock out of a book. I loved the idea. Made one out of Dr.Seuss book for another friend's little girl last year. So this year I used one of my faves as inspiration for the nursery. I have my good copies of the book in the book shelf, but bought this copy used from half.com for less than 2 bucks. It was even hardback :D. I took pages out of it and framed some of the artwork. And then drilled my hole for the cover and inserted my clock works.

July 10, 2008

my 1st scarves


Well, technically, they're not mine. And they're my 2nd. But the 1st came out kind of "ribbony"... the yarn worked up thicker than I expected. When we got to my SIL's house, my niece saw what I had almost completed during the 6 hour road trip, retrieved some yarn they had around the house... and the rest is history. I did mix it with some extra white I had because midwestern winters call for extra warmth. But who's thinking about winter this time of year?

Then, of course I had to make one for the other niece. So SIL hit the craft dept. at Meijer. I should have learned from my 1st (unpictured) scarf that it would not be necessary to double the yarn. And somehow it seemed to grow. I left the scarf unfinished, missing just the fringe... SIL can finish that part.

As you can see, the kitten liked them!

June 29, 2008

baby boy crochet blanket


basic pattern the same as i used for previously posted blanket.
i started this one first, but finished it tonight.
good think little guy didn't decide to come REALLY early.

materials used: 2 skeins worsted weight yarn (7 oz skeins, i think), NOT doubled like i did with the two different yarns in previous blanket.
size K hook (or 10 1/2 or 6.5 mm, depending on which sizing system you are used to)
i lost track of how many hours i spent, but it was far more than the 3 hours the pattern creator said it takes her.

June 23, 2008

finally learning to crochet

Some of you have seen this on my blog, but I thought this blog needed some action:

a present for Zann's baby

I'm still working on the first blanket I started, which is going to be for my little guy. Zann is due first, so I put mine aside. Now I have to get to the post office. :)

The pattern I modified is here.
I chained 100 stitches to begin and used a smaller hook, so it took more yarn and time.

May 28, 2008

Socks


Just a little summer sock knitting. Additional details here.

May 05, 2008

National Scrapbook Day

During the 1st weekend in May, scrapbookers around the world celebrate their hobby by participating in National Scrapbook Day. Phin and I went to an all day crop from 10-8 at our local scrapbook store, Picture Me Perfect. They had demos and gave away prizes throughout the day. In the 10 hours we were there, I created these 7 pages.


May 02, 2008

Springtime Cake

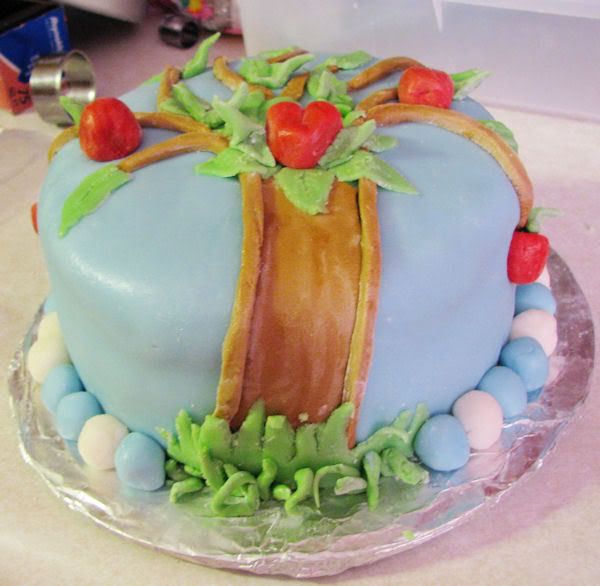
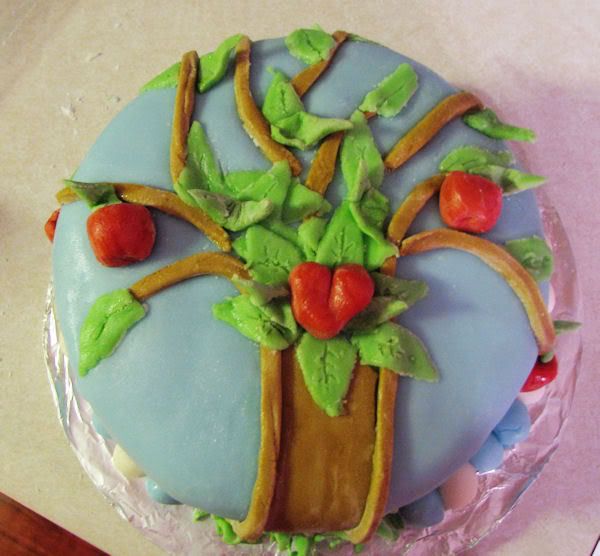
This weekend in town there is a benefit for a 9 year old girl in our community. She has a rare for of cancer called Ewing's Carcinoma. this is the second time she has had it. As part of the benefit they will be having a bake sale and a cake walk. I decided to make a fun cake for them to use however they want. Here are some pics:


Photobucket - Video and Image HostingPhotobucket - Video and Image Hosting

April 19, 2008

Bow Holder


The 3 ribbons I had hanging on the back of Juliana's door were overflowing with her 70ish bows, so I decided to make a bow holder. At first I was going to use a wooden letter J, but it just wouldn't hold enough ribbons for the number of bows she has. (she wears bows all the time... always has). So this is what I came up with. I'm not really pleased with how the letters turned out, but I wasn't displeased enough to paint over them and start again.

For what it's worth, there are 13 bows doubled (to 26) for pigtails.
And I didn't go broke on them... 26 were hand made and most of the rest of them were purchased using gift money for birthdays and whatnot (and several were purchased on clearance). I just wanted to clarify that before anyone started doing the math and assumed I spent hundreds of dollars on bows. No way :) If I could afford to spend that much on bows I would have just purchased a bow holder rather than making my own for about $3 :)

April 17, 2008

April 14, 2008

It's Taggy Madness

Once I got started, I just couldn't stop!! I really should make one for my own child....1

March 31, 2008

Head Band How to

I'm sorry it's taken so long for me to get these instructions posted. I wrote them months ago, but decided they needed pictures. That's what's taken so long. But better late than never, I hope.


First of all, I'd like to state that this takes minimal sewing skills. If you can sew a straight line, you can make one. Fear not! It also doesn't take much fabric, so it's a good way to use up scraps.

The best way I've found to do this is to make a pattern with freezer paper first instead of trying to measure & cut out on the fabric its self.


You need one strip of fabric measuring 7 inches wide by 16 inches long (well call this one A), a second 3 inches wide & 12 inches long (and this one B), and a 6 inch strip of elastic between 2/3 of an inch and an inch wide.


On strip A fold the long sides of the fabric in 1/4 inch, then 1/4 inch again on the wrong side of the fabric so the raw edges are completely hidden. On the short ends, you only need to fold them in once as this end will be hidden. Press down & stitch down all the way around the strip. You can either use a straight stitch in a color thread that will blend in, or a contrasting thread with a zig-zag stitch. I used the zig-zag contrasting stitch for the more casual head bands.


Next, fold the short ends of Strip B down to the wrong side of the fabric, press, and stitch. Then fold the band lengthwise with right sides together, and seam along the length only (5/8 inch seam allowance). This will be the casing for the elastic. Turn right side out & press.


Take Strip A & pleat the ends together (it doesn't have to be a perfect pleat) until the end is small enough to fit into the casing for the elastic. I whip stitch the pleats closed by hand. Then secure one side of the elastic band to one end of Strip A. Thread the elastic through the casing & sew the opposite end of the elastic to the opposite end of Strip A.


Pull the casing up over the ends of Strip A & sew down each end down. Ta-da! Instant (well, not really) head band!

March 22, 2008

March 16, 2008

Taggy Blanket


A few weeks ago BabyGirl & I went to a baby shower where the mother was given a small fleece blanket with tabs of ribbons running around the edges. I loved the idea since tags are the first thing that really hold a baby's attention.


I used one piece each of two contrasting fabrics (actually left overs from a swaddling blanket I made a few weeks ago, one pink cotton, one patterned baby flannel), and 5 different spools of ribbon in different colors & textures. I'm not 100% sure, but I think the two rectangles measured 17" x 20". The ribbons were cut in 5" lengths with pinking shears to prevent fraying (although next time I think I'll make the ribbons 3 1/2" to 4" long for slightly shorter tags). On the semi-solid fabric I stitched "Sweet Baby Girl" in yellow using tear away cross stitch fabric.


Then I folded the ribbons in half, and pinned them to the right side of the flannel with the loops facing the center of the fabric & the raw edges matching up with the raw edge of the fabric. Make sure you keep the ribbons at least an inch away from the corners.


Using the side of the presser foot as a guide I ran a seam as close to the raw edge of the fabric as possible. I set the needle position on my machine to sew along the far right position. On the second seam, I moved the needle to the center position but continued to use the edge of the presser foot as my guide.


I pinned the right sides of the fabrics together and seamed around the edges with a 5/8" seam leaving a hand width opening to turn the fabric. Clip the corners & turn the fabric right side out.


After whip stitching the opening shut, I pressed the edges of the blanket down flat. Finally I ran a zig-zag stitch around the outside edge of the blanket to prevent it from rolling up when washed & totally secure the ribbon tabs.


Here's the end results. As I said before, the tabs turned out a tad longer than I'd like, but I'm still very happy with the finished product. And I've found the gross grain ribbon is the easiest to work with. The satin finish snags too easily.


BabyGirl is giving it to her teacher's first grandbaby. She's very happy with it (she helped lay out the ribbon pattern).


March 15, 2008

Bunny in an egg

While wandering around Wal-Mart yesterday looking for a super simple craft for BabyGirl's Spring Party at school, I thought of this.

It's ears are made of white craft foam that I cut in a petal shape. The teeth are also craft foam. I used the sticky tabs you put on the back of photos for scrapbooking to stick the craft foam to the egg since the glue wasn't drying. Two googly eyes & half a cotton ball complete the bunny.


I cut out all the foam, put the stickies on the back of the foam, and put it all inside the eggs so all I have to do is pass out the eggs.
Very easy. Very cheap. Very cute (at least I think so). Now I only hope the kids like them.

March 08, 2008

Snow time, show time


When I got up this morning and saw the snow, I knew I finally had my chance to photograph two of my latest knitting projects. Details here.

February 24, 2008

Zann will so appreciate these!!!

Stealthy sweetgum Ninjas!!!

My buddy, Run Mike and I were having an IM conversation about running (what else?!) and he mentioned that he turned an ankle stepping on a sweetgum ball last week. He said, “they sneak up on you like a ninja.” So, during Saturday’s run (that 6 miler!!!) my muse spoke and I came up with these!!! Sweetgum ball NINJAs!!! Heee!!!

February 17, 2008

Gel Transfer Tutorial

(For Cate and anyone else who may be interested : .)

First of all, I used this link for instructions. They're quite good. If my directions are not clear, just click on the link and scroll around until you find their xfer tutorial : .)

You'll need:

1) Golden Gel Medium, my container is Soft Gel (Gloss). Any polymer acrylic medium should work.
2) A picture (color or B&W) freshly ink jet printed on regular text weight paper, or a photocopy. (Text will transfer backwards, so you probably don't want to use a picture with text that you want to read. I think text would look good as just a background tho'.)
3) The surface you are transferring to. I used cardstock, onto which I printed text and painted over the area where I wanted to transfer.
3) Paintbrush or fingers.
4) Something to burnish with, I used a bone folder and my fingers.
5) Small container of water.


Get your supplies ready.

Goop some gel medium onto the picture you want to transfer. I like to feel what I'm working with.


Make sure you have a good layer of the medium on your picture, too thin, it'll dry and not transfer; too wet and it will take forever for the transfer to dry for backing paper removal.


Burnish until it appears that the entire image has adhered to the base paper. I ended up using my fingers, its that tactile thing again. Some of the medium will probably ooze out from under the picture. Wipe it off, or leave it there...your choice. Let the piece dry to touch. If you are tempted to peel the backing layer off too early, you might be disappointed with the outcome, but sometimes that's the beauty of the transfer, the imperfectness of it all.

Start lifting a corner to see if the picture transferred. If it appears that your image has transferred, you can continue to peel off the backing paper. If some of the backing paper remains get like a half a drop of water on your finger and gently rub where the backing paper is still sticking and gently remove the extra paper. Sometimes it looks cool if you leave some on, again, your choice. Artistic license and all that! (I didn't take a photo of this step, it is in the tutorial.)

The finished product. The top picture of the three is the original, I just glued it onto the cardstock, the bottom two pictures are the gel transfers. Click on the picture to see the detail and the imperfectness of it all. (I made this at the request of the cute boy at the gym his favorite band is Sublime, however, he doesn't seem to keen to get it from me. I guess I learned a lesson here! Some people just don't appreciate the effort!) I like it, so I'm not opposed to keeping it for me.

There are other transfer methods, using clear packing tape, Dove blenders, acetone transfers, and there are the fab-o polaroid transfers. I've only tried the tape transfer. I'm kinda not interested in using toxic products, so I definitely haven't tried the acetone transfer method.